Difference between revisions of "Vitals / Measurements"
(more edits and more screen shots) |
(Added glossary link to Application~) |
||
| (One intermediate revision by one other user not shown) | |||
| Line 46: | Line 46: | ||
17. On the top menu click on "Templates" and then "New Template" from the drop down menu, as seen below: | 17. On the top menu click on "Templates" and then "New Template" from the drop down menu, as seen below: | ||
| + | [[Image:VitalsMtemplate.JPG]] | ||
| + | - The following screen will open: | ||
| − | + | [[Image:VitalsMnameT.JPG]] | |
| − | + | 18. Enter the Template Name. (i.e. All) and click "OK" | |
| − | |||
| − | 18. Enter the Template Name. (i.e. All) and click | ||
19. Click on the '''+''' cursor found on the left side of the "Vitals Template Editor" screen. | 19. Click on the '''+''' cursor found on the left side of the "Vitals Template Editor" screen. | ||
| − | [[Image: | + | [[Image:VitalsMtemplate2.JPG]] |
20. Choose which Vital signs that you want displayed for the template. | 20. Choose which Vital signs that you want displayed for the template. | ||
| Line 69: | Line 69: | ||
[[Image:VitalsMsave.JPG]] | [[Image:VitalsMsave.JPG]] | ||
| − | 22. Now the “Vitals” screen should now be working from within the VOE CPRS application. | + | 22. Now the “Vitals” screen should now be working from within the VOE CPRS [[application~|Application]]. |
[[Image:VitalsMend.JPG]] | [[Image:VitalsMend.JPG]] | ||
Latest revision as of 14:46, 22 February 2012
Installing the Vitals module
***You should have VistA installed and it should be running *****
1. Go to:
ftp://ftp.va.gov/VistA/Software/Packages/Gen%20Med%20Rec%20-%20Vitals%20-%20GMRV
2. Install VITL5_0_1.EXE by double clicking on the file name and you will get a pop-up window
3. Click "Run" and when the files finish loading the Vitals Wizard will open
4. Click "Next" and Vitals Wizard will begin the install.
5. Click Next two more times and the files will begin to copy over
6. After the files are copied click "Next" and you will get a screen for Set UP Status
7. Click "Finish" and the Vitals icon should appear on your desktop.
8. Go back to ftp://ftp.va.gov/VistA/Software/Packages/Gen%20Med%20Rec%20-%20Vitals%20-%20GMRV and install VITL5_P18.EXE by double clicking on the file name
9. Click Run and when the files finish loading click "Next"
10. Click "Finish" and the Vital Manager icon should appear on your desktop.
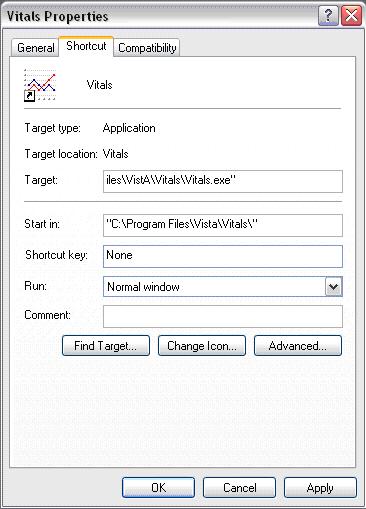
11. Right click on the icon on your desktop and click Properties and the following windows will open:
12. Type a space at the end of the "Target" and enter your server IP and Port number into to the end of the target field. (This information can be Copy and Pasted from your CPRS shortcut) - It should look something as follows:
13. Click "Apply" and click "OK"
14. Repeat steps # 11 - 13 for
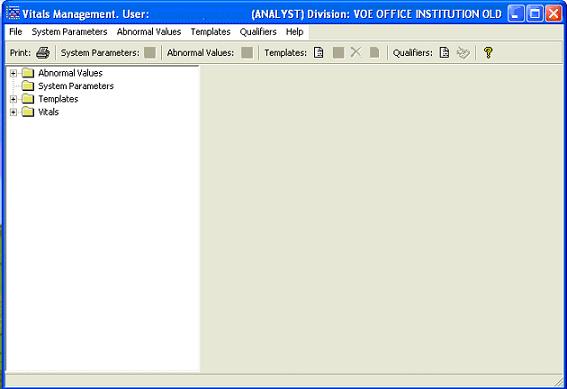
15. Open up the Vitals Manager by double cliking on the icon and the login screen will open. Enter the same access and verify code that you use for logging into CPRS and you will then see the following screen:
16. Click on the + sign under “Templates” and click on the “System” folder.
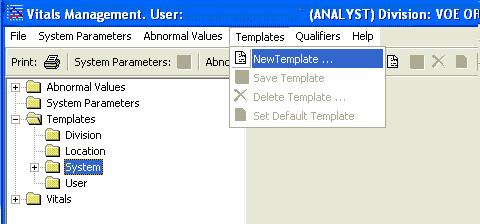
17. On the top menu click on "Templates" and then "New Template" from the drop down menu, as seen below:
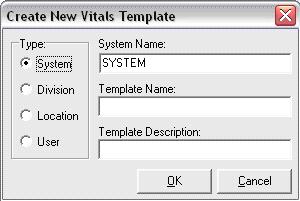
- The following screen will open:
18. Enter the Template Name. (i.e. All) and click "OK"
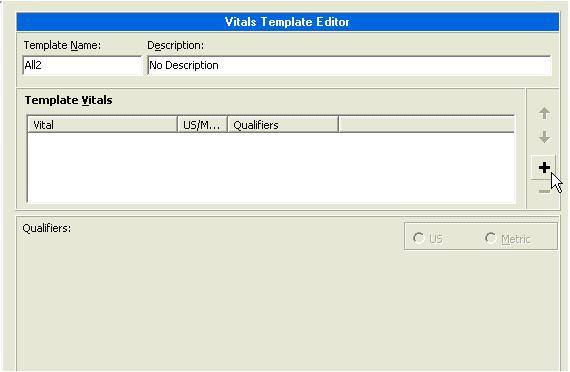
19. Click on the + cursor found on the left side of the "Vitals Template Editor" screen.
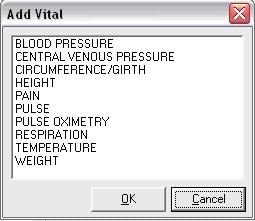
20. Choose which Vital signs that you want displayed for the template.
- Hint: If you want all of these select the top one and then while holding down the “Shift” key select the last item.
- Click "OK"
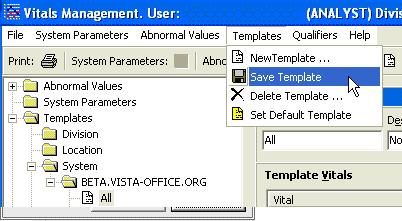
21. Click "Templates" found at the top of the screen then click "Save Template" from the drop down menu bar.
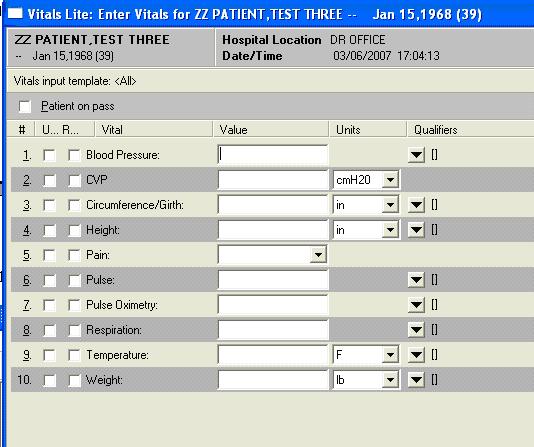
22. Now the “Vitals” screen should now be working from within the VOE CPRS Application.
